Router Registration
This is a walkthrough on how to register a router
How to Register a Router
Register a Router
- Register a new router by navigating the the routers tab and clicking on the Register router button.
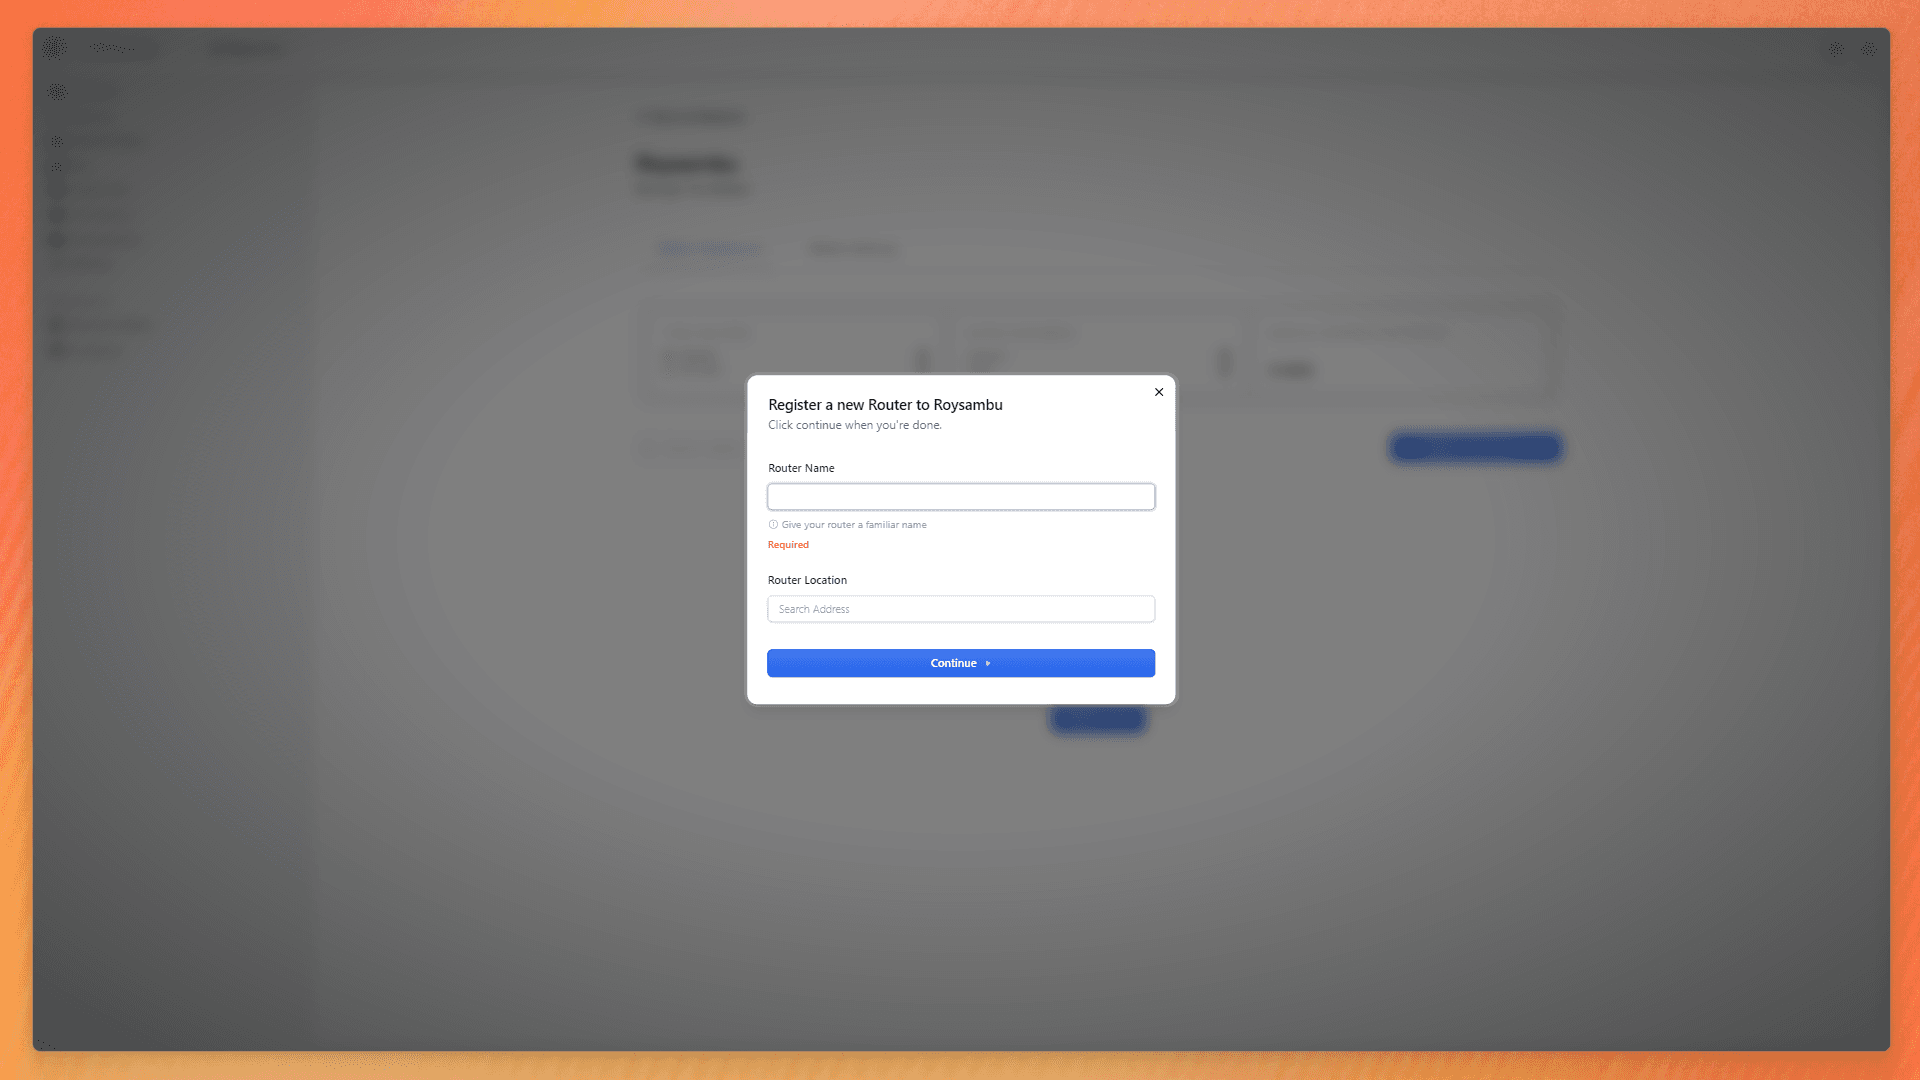
Allow the location you search for to be found, click on it to save.
A configuration script will be presented to you to run on your router.
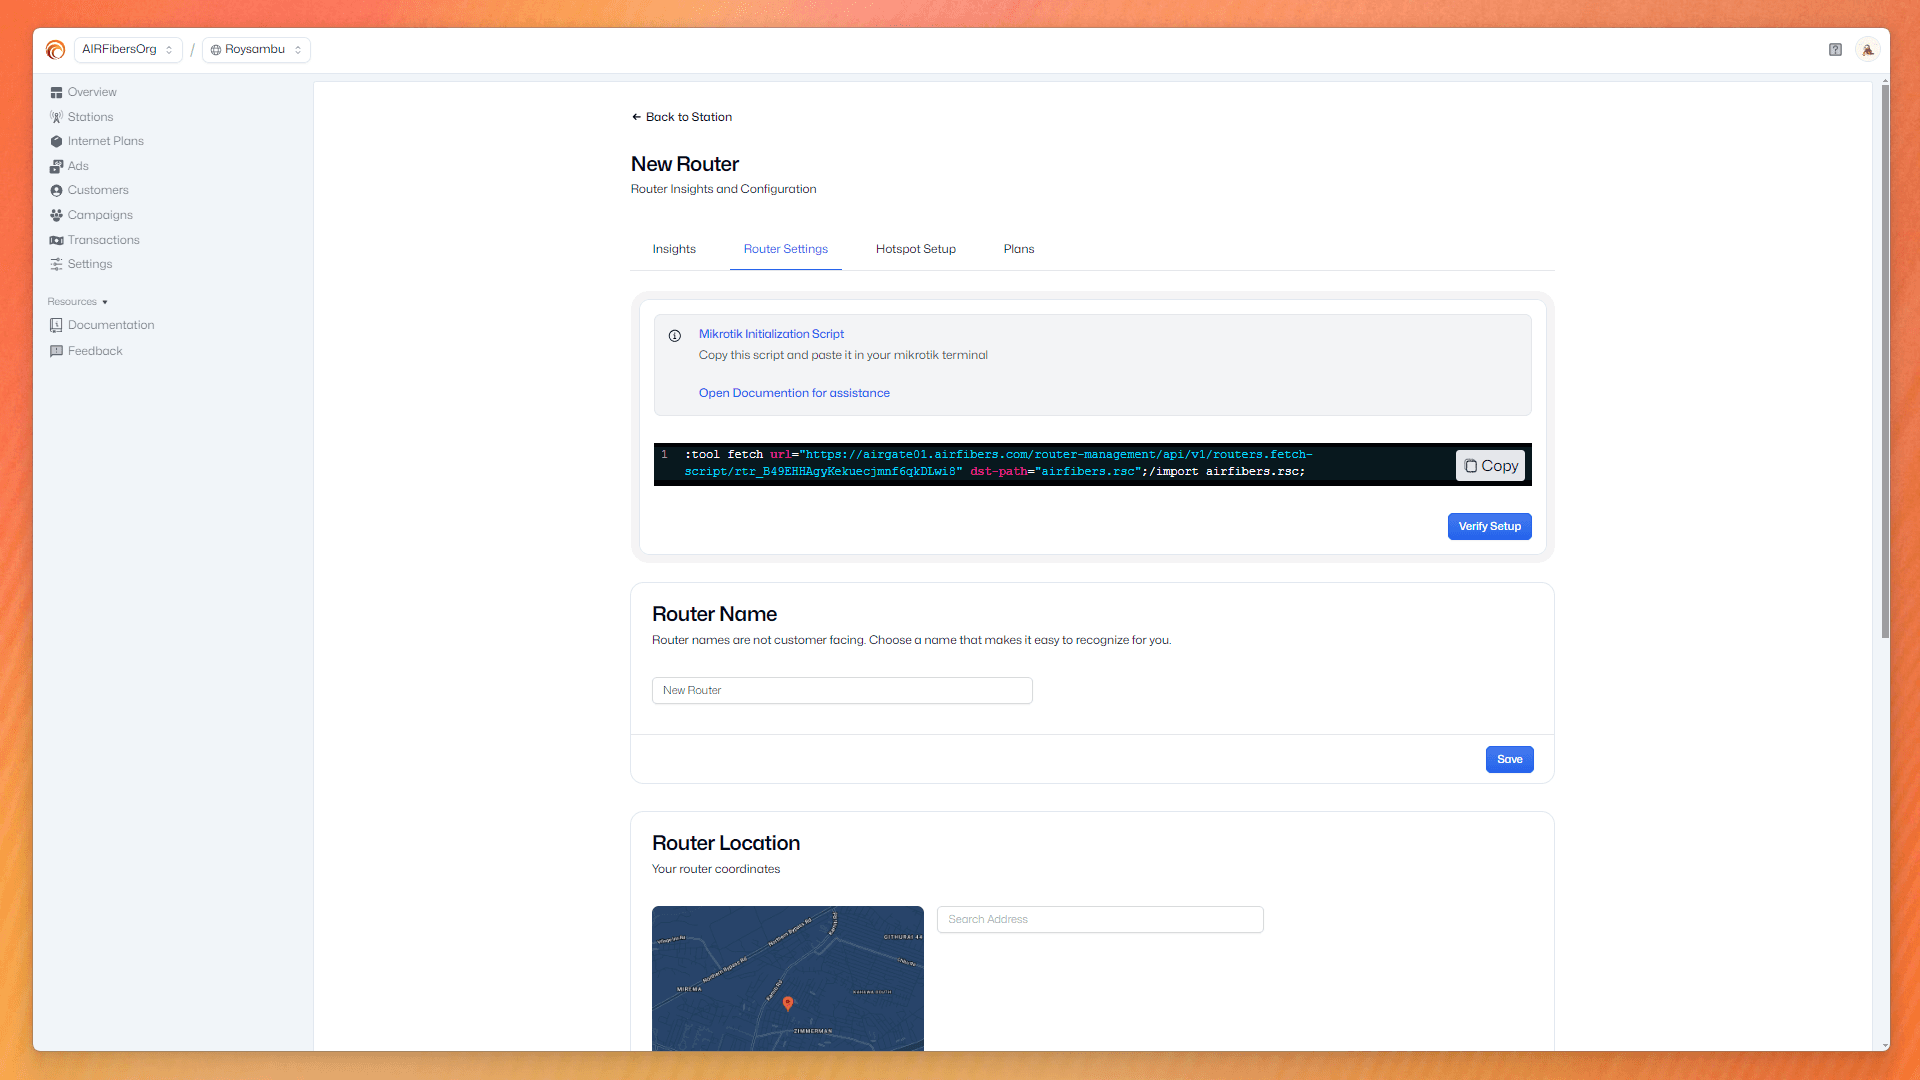
- Access your router through Winbox and paste the script on the terminal
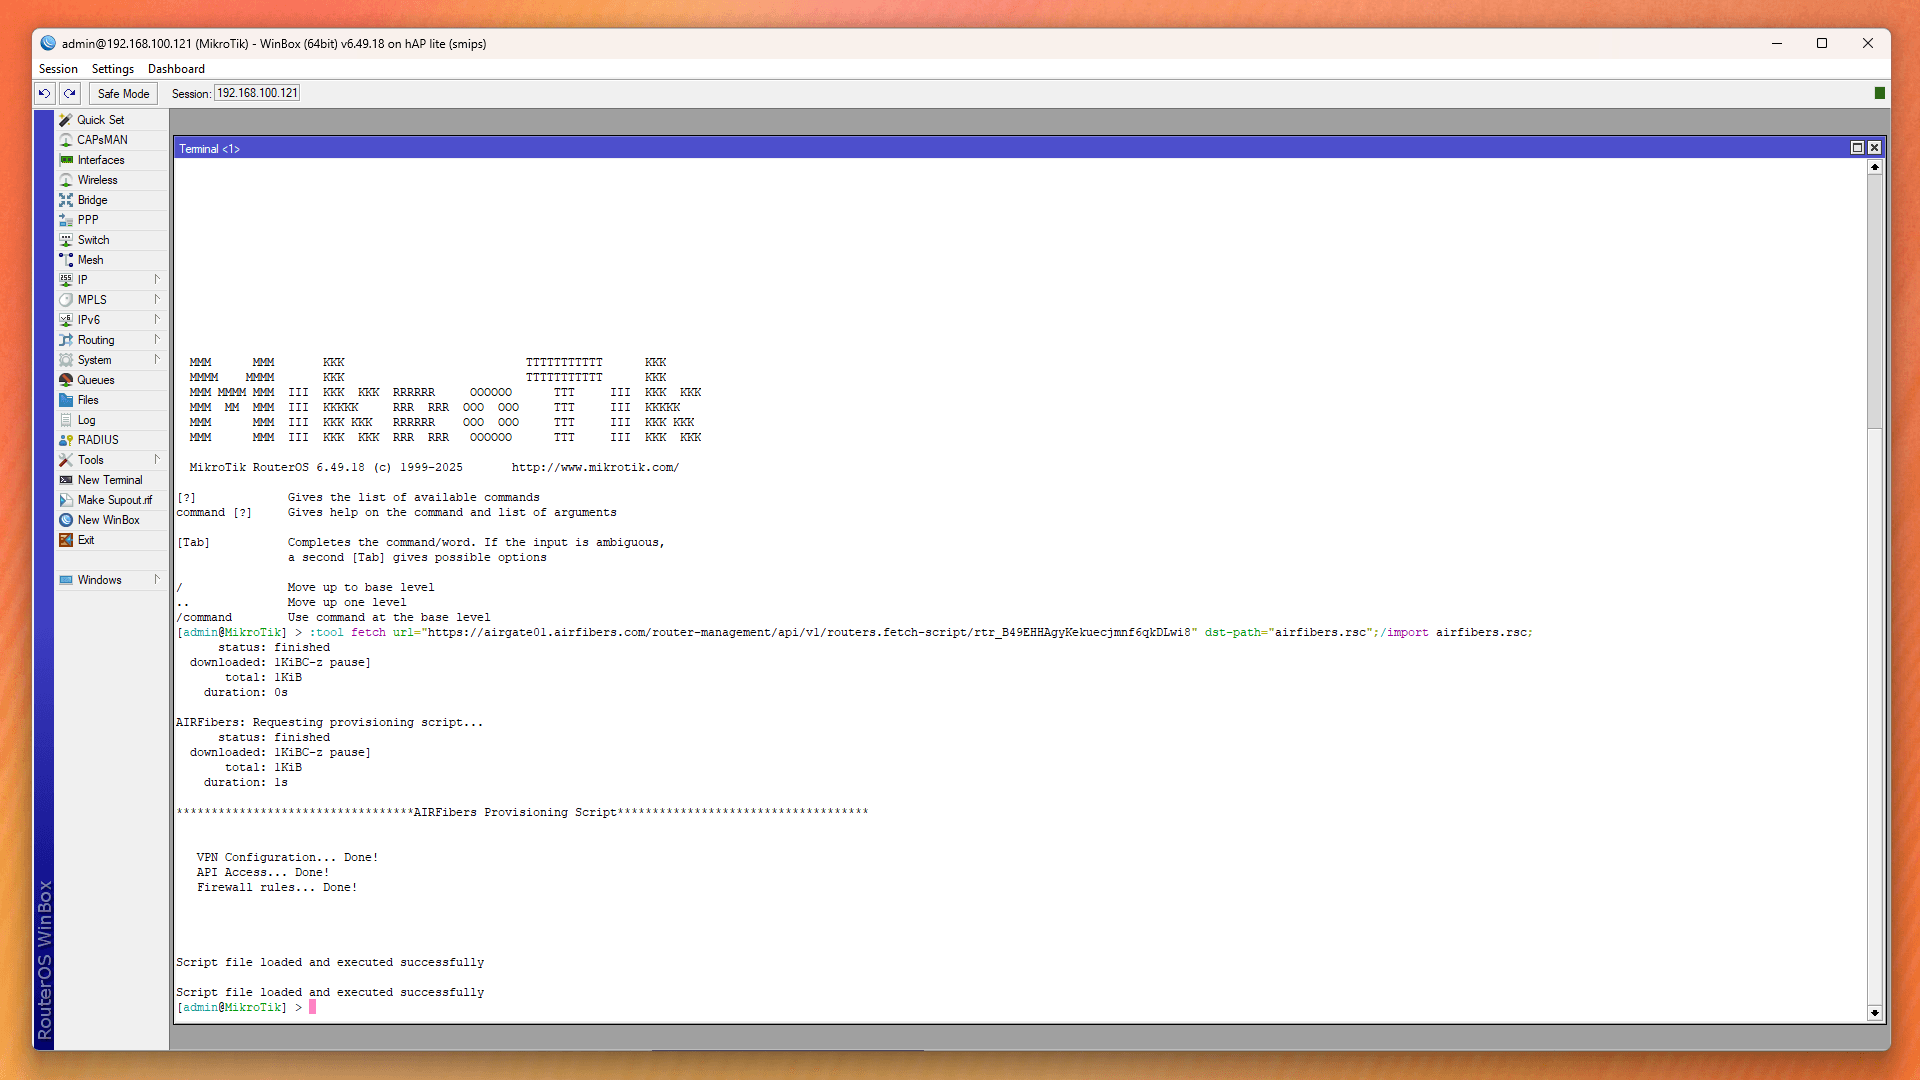
- Verify your setup.
In case the script does not work, Click here to learn how to handle the router configuration
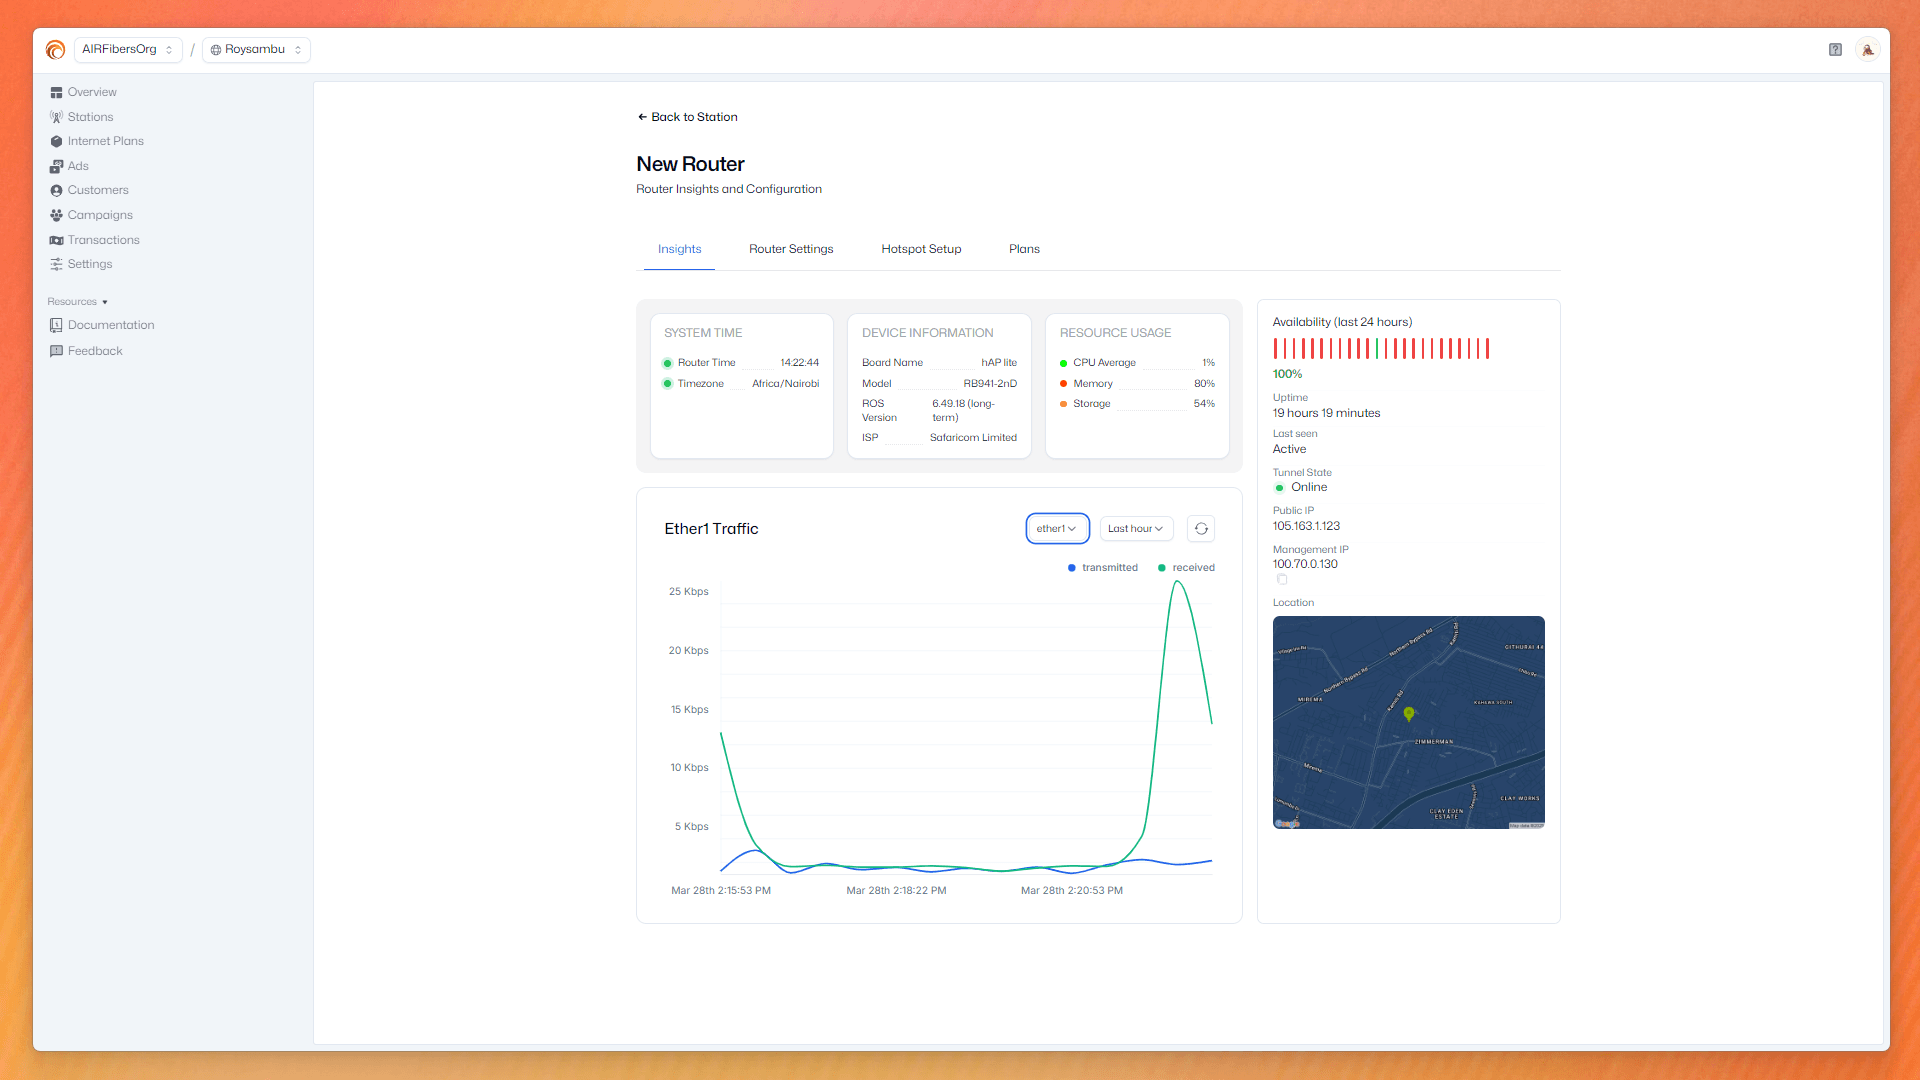
Check insights
Navigate to the Insights tab and wait on your router to come up as online. It will take about a min or 2 before all our data is fetched, but once it is stated online, you can proceed to the next steps.
Setup hotspot
After a successful router registration you will setup your hotspot information.
Navigate to the Hostpot setup tab to setup your hotspot server. This is page that your customers interact with on buying a hotspot plan.
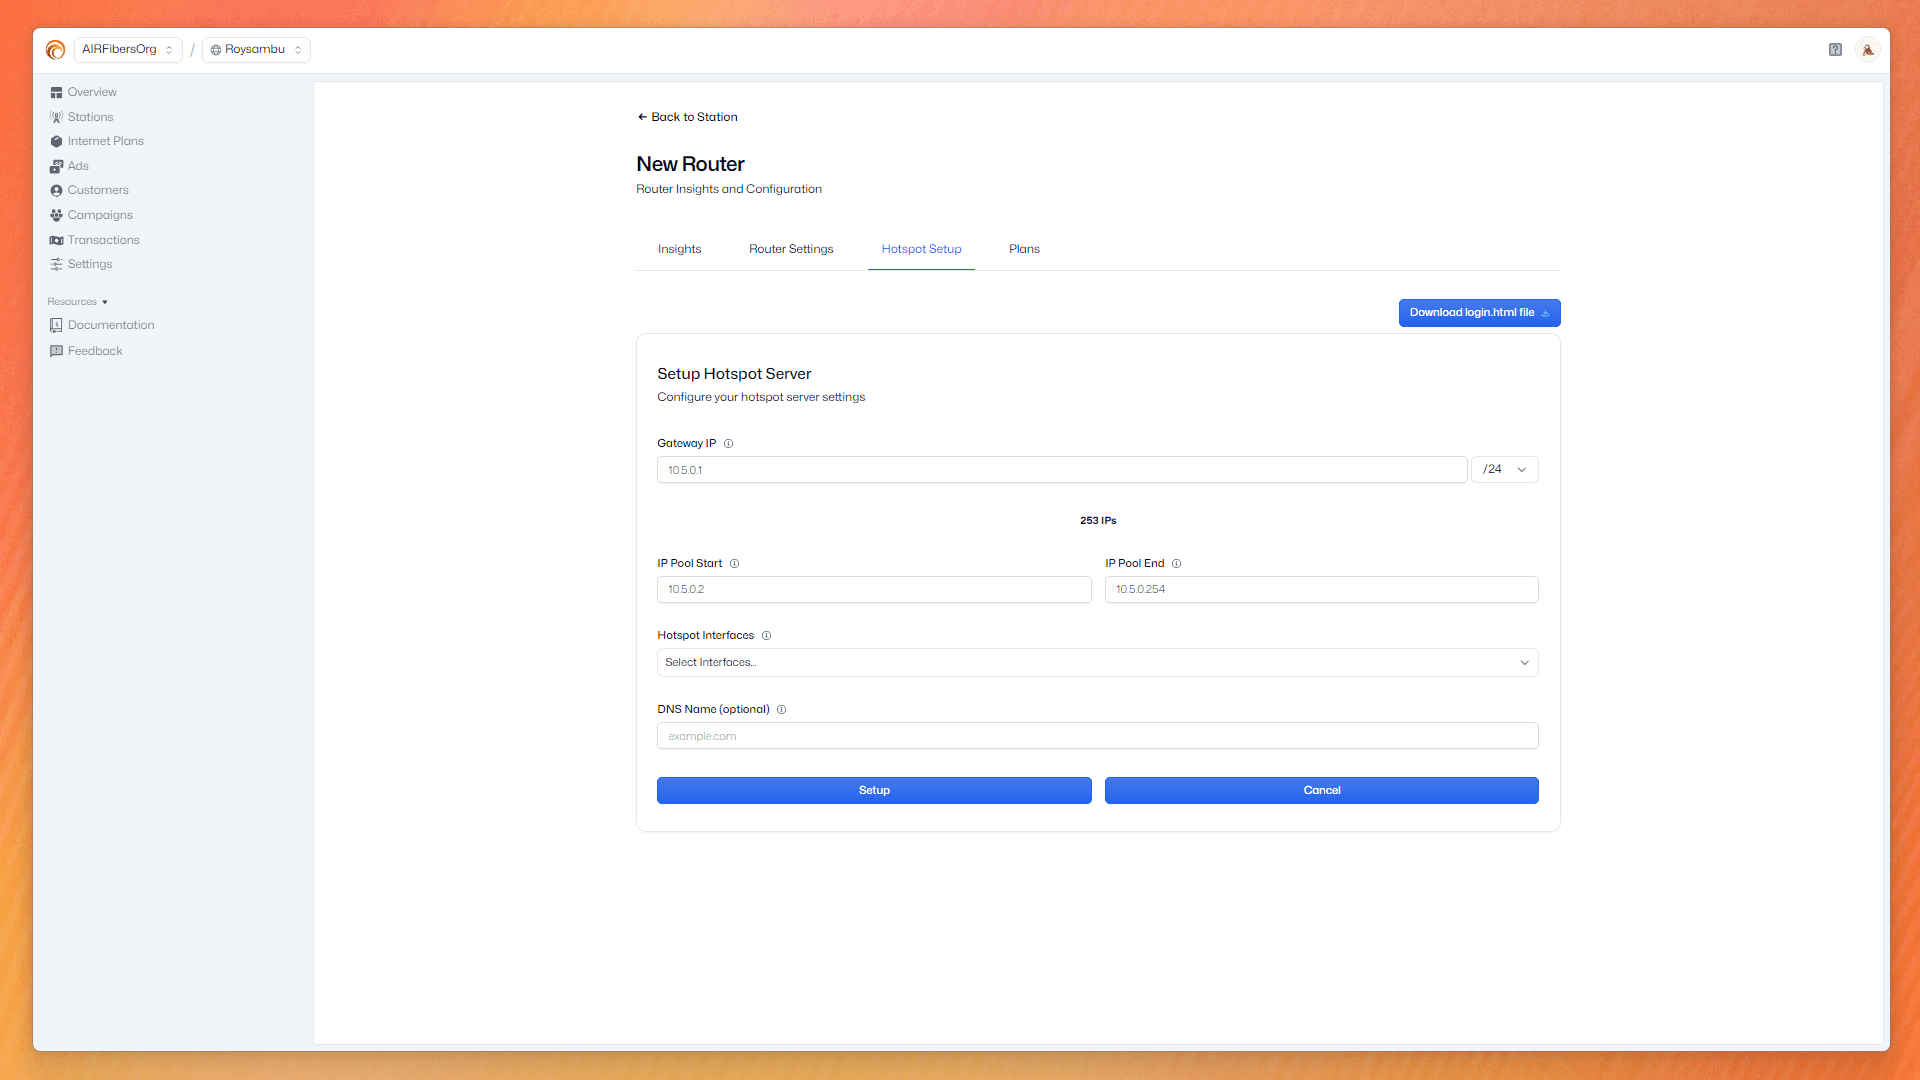
Here, provide starting ip address or use the default settings.
Select wlan1 as recommended interface or an interface of choice. Do not select the interface you used on configuring your router.
Provide DNS name, this name seen as the link leading your customers to buy hotspot packages. Example: anyname.net or .com or .org or a domain name of choice.
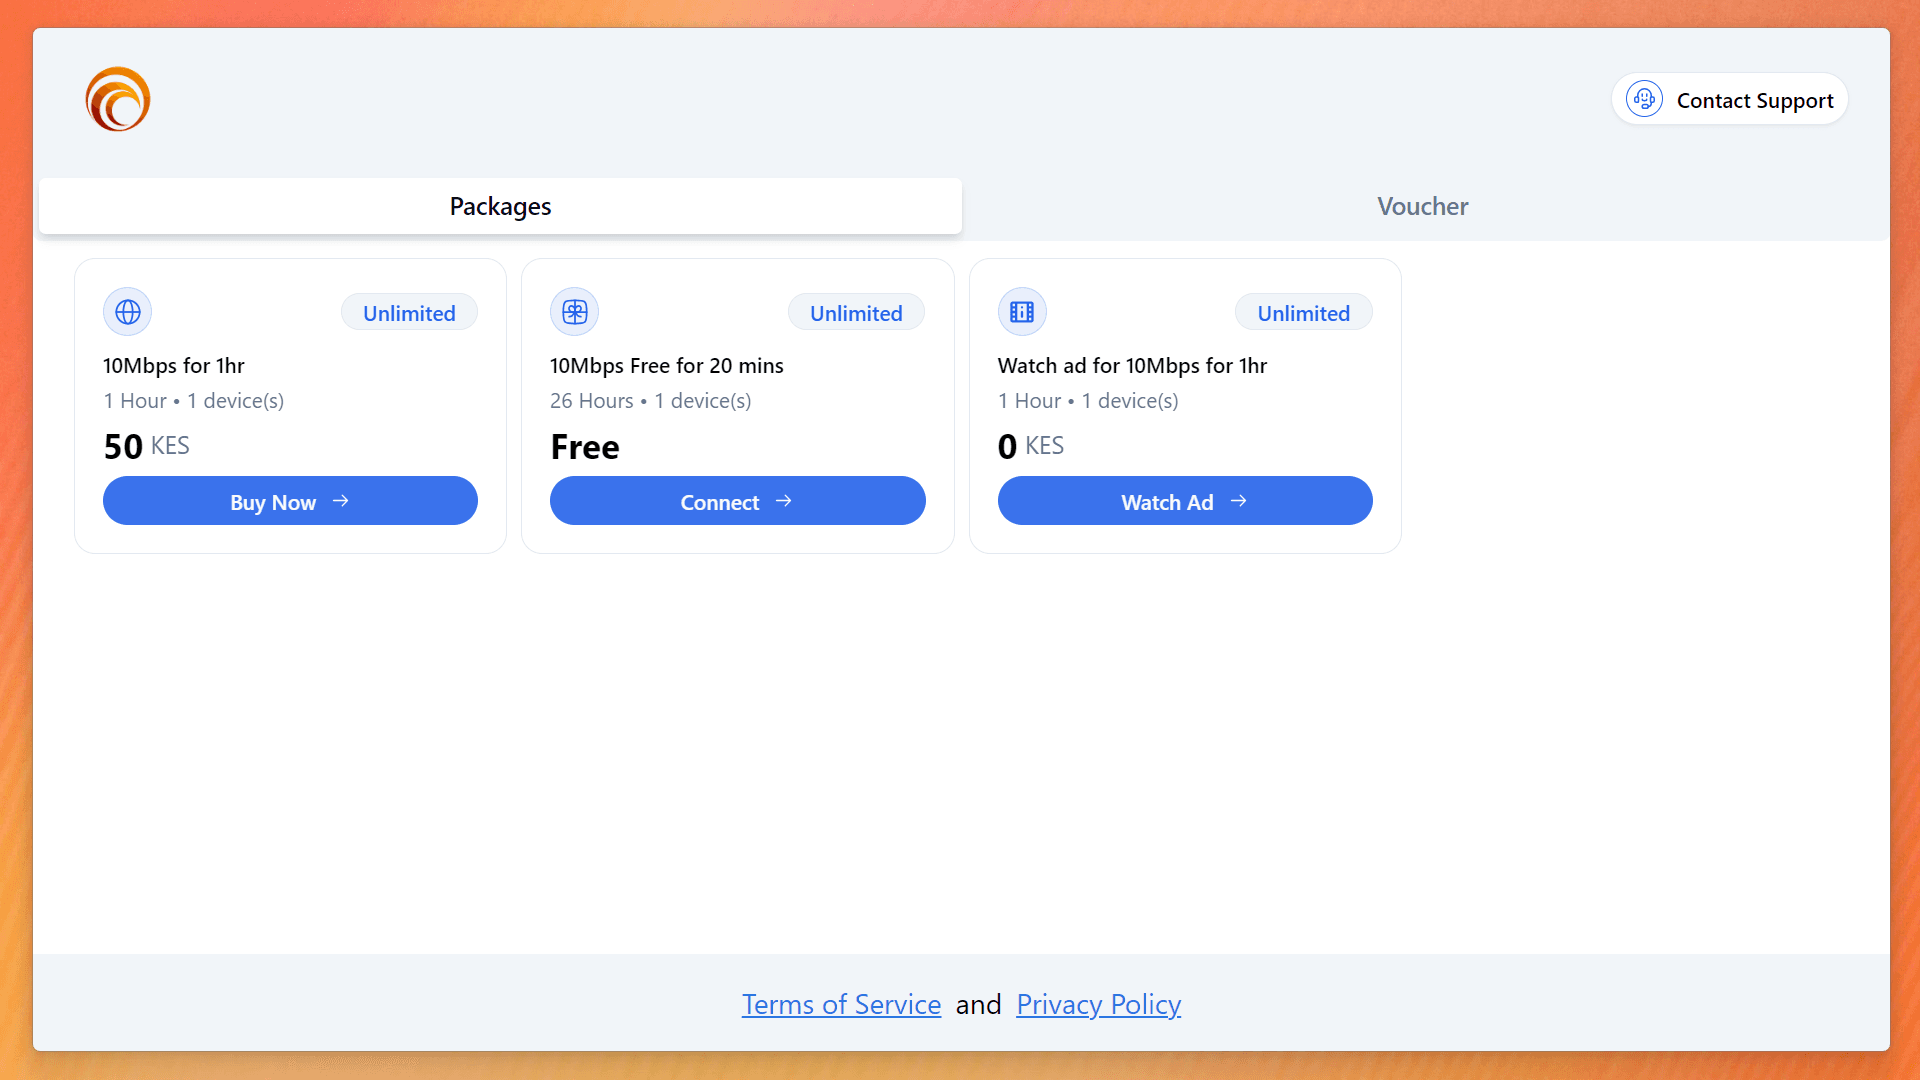
On setting this up, you should be able to sign in to your WiFi network through your devices.
Click the WiFi icon to got to settings and click on the WiFi with the SSID name you set earlier.
It should ask you to sign in to the network. The network name will be the DNS name you provided.
Once signed in, you will be provided with an interface of your hotspot packages.
You can create new hostpot plans for the specific router through the hotspot plan tab.
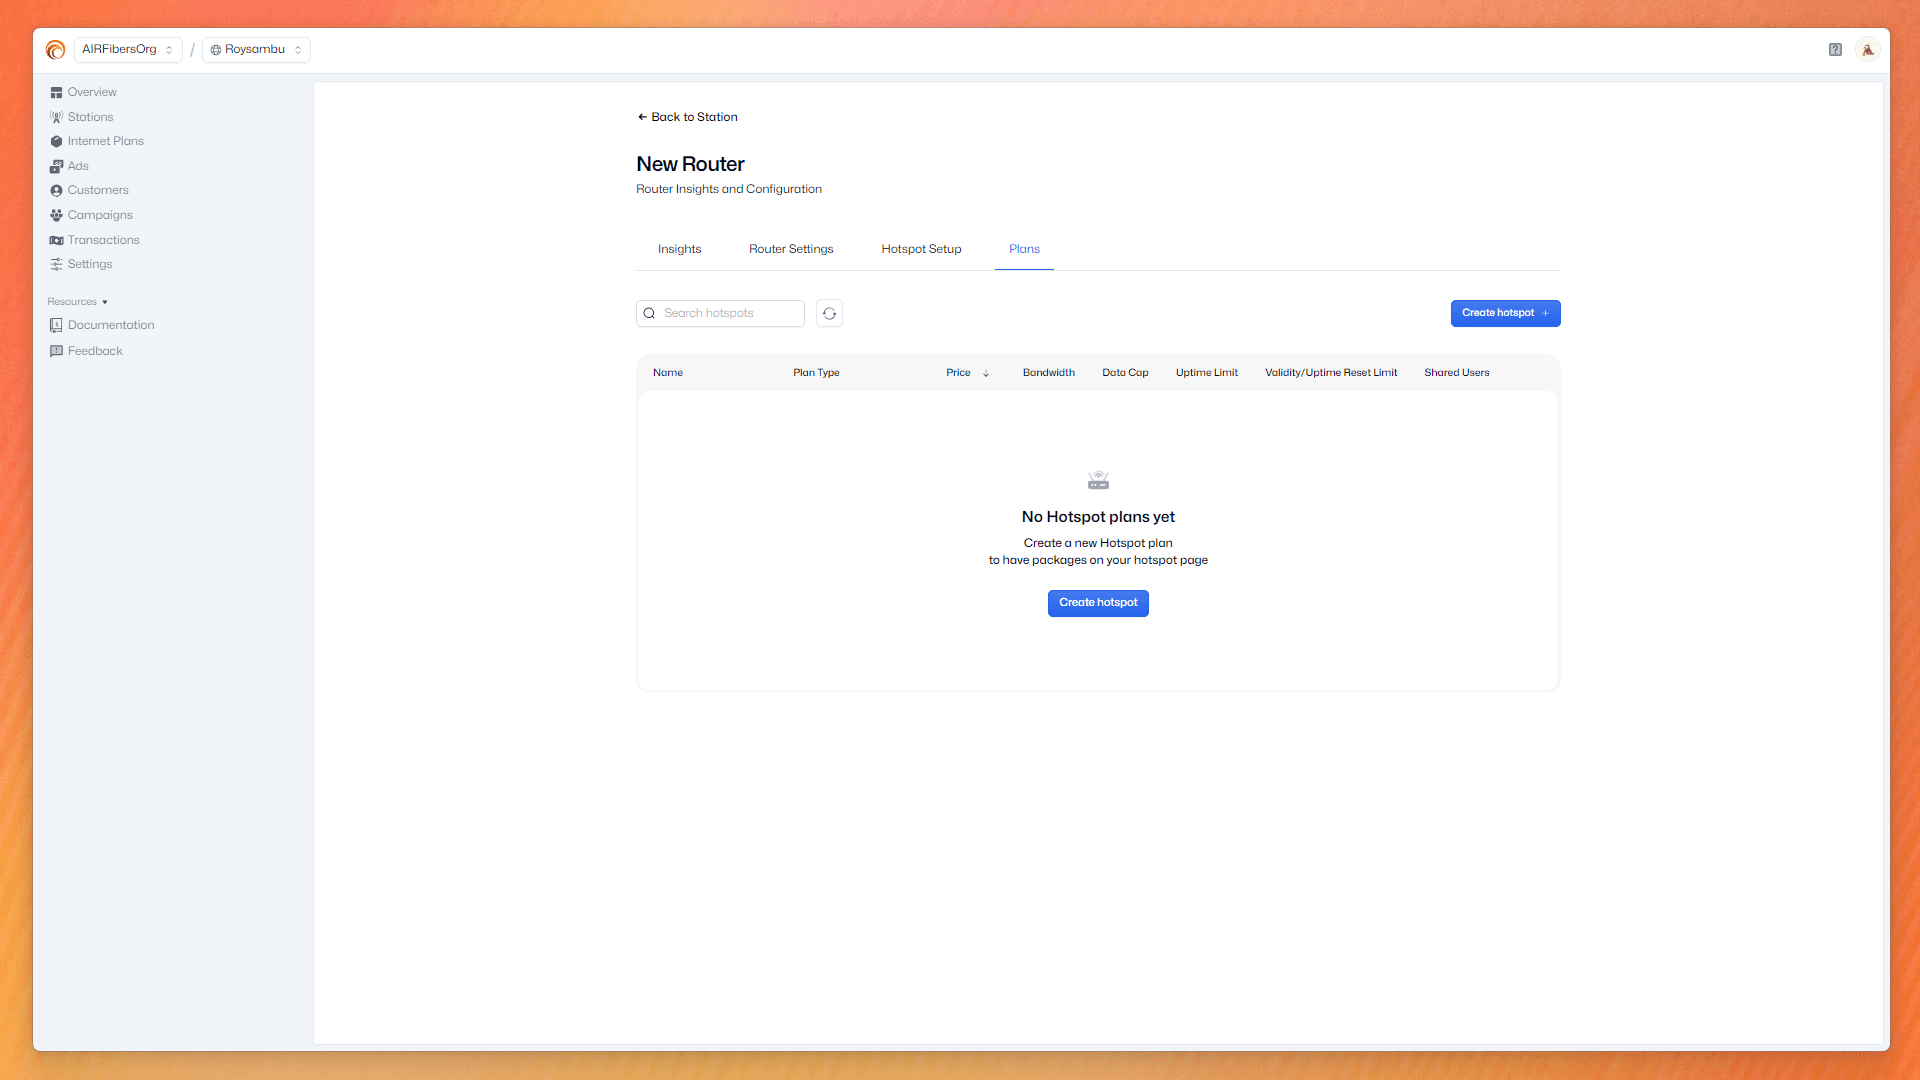
You will, however, need to create bandwidths